Thursday, March 9, 2017

Portrait Retouching

Unit: Portraits
EU:
EQ:


Frameworks:

Tutorials
*The links below seem like some of the most clear as well as short tutorials that I have found on youtube but you may use a different tutorial if you find one that is easier to understand. Make sure to copy and paste the link into your reflection. 

Objective: To learn some basic portrait retouching tutorials and effect skills

Assignment 1: 
  • practice 2 youtube tutorials on portraits that you already have or an image of someone that you can take in class and upload. I would like you to try one skin tutorial and one eye tutorial. 
  • Post before and after results on your blog (4 images)
  1. How to quickly smooth skin and remove blemishes and scars
  2. How to remove acne in photoshop
  3. Eyes! How to brighten, enhance, and change eye color
  4. Advanced: How to change eye color (special effects)

Homework: Shoot Portraits using clear light in the eyes and considering composition and detail. Focus on the eyes of the viewer. If indoors, try to capture an image using natural light near a window. 

Camera setting: use your aperture mode (Av) and scroll to the lowest number settings in order to get a shallow depth of field and a blurred background. 

CS: 30+ images of portraits showing at least 3 different people

Assignment 2: 

  • Choose 3 photographs (1 of each person) to edit in Photoshop using some of your new skills. 
  • Upload to blog with a short reflection explaining what you edited in your photos


Tuesday, February 28, 2017

Explosion Book

EU: Digital Photography allows the artist to manipulate photographs to achieve desired effects. 


EQ: How and why do you use selections in Photoshop when working with your photographs?


Standards

  • 1.9 Demonstrate the ability to create 2D and 3D works that show knowledge of unique characteristics of particular media, materials, and tools
  • 1.10 Use electronic technology for reference and for creating original work
  • 2 Describe and apply procedures to ensure safety and proper maintenance of the workspace, materials, and tools
  • 4.4 Produce work that shows an understanding of the concept of craftsmanship
  • 4.12 Choose and prepare artwork for exhibition, and be able to discuss their choices


Unit: Selections

Objectives: 

  • To continue working with selections in Photoshop
  • To exhibit images


Assessments:
You will get 4 grades for this assignment
  1. Contact Sheet 45+ images
  2. Edited book images
  3. Book Craftsmanship
  4. Book Cover and Title Design
Rubric Criteria
  • Craftsmanship
  • Software
  • Imagery (composition/light)
  • Reflection


Steps

To start:

  1. Choose a theme and take 45+ images focusing on variation of that theme (close up vs distance, etc)
  2. Print a contact sheet and turn in (graded)
  3. Choose and edit pictures
Document set up/triangle selections:
  1. Start a new Photoshop document entitled "Explosion Book" at 8x8 inches 300 pixels/inch, RGB 
  2. Set up guides by choosing view -> rulers (richt click in ruler to makes sure at inches)
  3. Pull out a guide from each ruler to the 4 inch mark horizontally and vertically to create 4 squares
  4. Start 3 groups with the folder icon in the layers palette 
  5. Label groups page 1, page 2, page 3
  6. Start with page 1
  7. in upper right corner use the polygonal lasso tool (3rd tool down under the lasso)(hold shift the entire time) to click out a triangle in the upper left section
  8. Save selection by going to the select menu at the top toolbar and choosing save selection
  9. Name the selection "left triangle"
  10. Repeat steps 7-9 and make a triangle in the right section of the upper right corner square and save selection as "right triangle"
Image Placement:
  1. open images that you would like to use and start to drag and drop them into page 1
  2. Resize by holding CTRL + T and holding shift
  3. use the rectangular marquee selection tool (2nd tool) to drag out selections of your squares and to get rid of the outside pieces go to the select menu at the top toolbar select -> inverse, press delete on keyboard
  4. for the triangle images, place the images where you would want them, go to select -> load selection and choose either the right or left triangle and delete the exterior again using select -> inverse
  5. Edit as you go (choices are your own to fit your theme)
  6. Remember-*Page 2 does not need the squares filled in the upper left and lower right squares...only the 4 triangle pieces


Monday, February 6, 2017

Photoshop Puzzle

EU: Digital Photography allows the artist to manipulate photographs to achieve desired effects. 


EQ: How and why do you use selections in Photoshop when working with your photographs? 


Unit: Selections

Camera Functions: Continue on Aperture Setting or Shutter Speed Settings
Depending on the subject you choose for your assignment start to choose the right camera setting which are good for you. Landscapes are often stronger when the aperture is very large. Objects or portraits can be stronger with a low aperture 


Contact Sheet: Shoot at least 15 new photographs using the digital camera on any subject that you think would be good for this assignment. Pay attention to lighting and composition. 

Assignment: To use one strong image to which you can apply a jigsaw puzzle effect in Photoshop. 

Objective: To enhance software skills dealing with selections and to learn how use certain fx

Get the puzzle template from Mrs. Donovan's flash drive first

Steps for puzzle effect:
After copying and pasting in your layers to get the spacing and overlap that you want to include missing pieces and unfinished edges, follow the steps below....

Apply a background
  1. Find a background on the internet that would contrast well with your image but have some sort of slight texture like the example above. Do not use another photograph. 
  2. Copy, paste, and transform this layer to use underneath your puzzle

Apply Drop Shadow
  1. Select one layer with an image or puzzle piece and apply a drop shadow by clicking on the fx button at the bottom of your layers palette and choosing "drop shadow"
  2. Adjust the settings to get a believable look that is a darker shadow close to the piece (do not make it too hazy or blurred because this will make the puzzle look like it is floating)
  3. Change the color of the shadow to match your background by clicking on the color swatch setting and using your eyedropper tool to select the tone of the background (don't close out of the box yet)
  4. Make the color of the shadow darker now by clicking on your eyedropped color and selecting a deeper version of that color
  5. Right click that layer and select "copy layer style"
  6. Move to each layer with a puzzle piece or the image and right click that layer to "paste layer style"

Apply Bevel and Emboss Effect to the puzzle pieces and image layer
  1. Select one layer with a puzzle piece and apply a beveled and embossed look so that it appears 3D by clicking the fx button at the bottom of your layers palette and choosing "bevel emboss"
  2. Use the default settings and just play with the sliders to create a minimal but believable look 
  3. Right click that layer and select "copy layer style"
  4. Move to each layer with a puzzle piece and the image layer and right click that layer to "paste layer style"
Apply Bevel and Emboss Effect to the puzzle lines
  1. Select the layer with the puzzle lines to apply a beveled and embossed look so that it appears 3D and imprinted into the image by clicking the fx button at the bottom of your layers palette and choosing "bevel emboss"
  2. change the setting from inner bevel to  "pillow emboss" so that you can get a slight indented look
  3. Pull the depth up a bit and keep the other sliders toward the left. It should be a minimal indent
  4. Pull that effect apart so you can turn off the puzzle lines off and only view the imprint by going to the Layer Menu at the top of your workspace, choosing layer style, and then create layers (you will see the fx part has been removed from the layer and divided into 5 different layers)
  5. Throw the top three layers that you just created into the trash
  6. The top layer left will be the shadow of the indent and the bottom layer will be the highlight. Adjust the opacity in the layers palette if you think the shadow looks to dark to get a believable look. 
Arrange your composition
  1. Select the two layers with your image and your puzzle lines at the same time by holding shift while you click on them
  2. Use CTRL + T to turn or twist them by hovering over a corner so that the puzzle is not too straight on your document (It can even go off the page a bit)
  3. Go to each of the puzzle piece layers and use CTRL + T again to rotate those pieces too. 
  4. Move the pieces around the page to get a interesting composition. They can overlap a bit, go off the page, or even be on top of the puzzle in some spots. 
*Check with me to make sure all looks good
*Save as a JPEG to upload to your blog with a reflection


Friday, February 3, 2017

Texture Overlay Directions

Follow these instructions for a texture over your geometric photograph


Steps:

Download and Save Textures
  1. Click on this link: Spoon Graphics 9 Free High Resolution Grain Textures
  2. Scroll to the bottom and click on "Download the free grain textures"
  3. Click on the download and click on "Open when done"
  4. Once it opens, click on the folder marked "9 Free Grain Textures"
  5. Click on the JPEG subfolder
  6. Create a new folder in you photography folder named "Grain Textures"
  7. Select all of the grain images by clicking on the first one, hold shift, click on the last
  8. Drag and drop them into your new "Grain Textures" folder so you can view the JPEGS (you cannot see them under the download folder)
Applying Texture to Photo
  1. Choose one to open in Photoshop and bring into your Geometric Photo document
  2. Put that layer on top and set the blend mode to screen
  3. If it is too busy try another, If not enough you can copy the layer and flip it over by Ctrl + T to spin and set that copy to screen as well
  4. You may add another texture if desired but don't use a normal photograph
Saving your Photo
  1. Save as both a JPEG for you blog and the PSD (Photoshop) file for me in case I would like to print it larger for the art show. 


Tuesday, January 17, 2017

Geometric Photograph

EU: Photographers and designers will use both Illustrator and Photoshop to create mixed media imagery.

EQ: How and why do you use selections in Photoshop when working with your photographs? 

Unit: Selections

Camera Functions: Continue on Aperture Setting
Depending on the subject you choose for your assignment start to choose the right camera setting which are good for you. Landscapes are often stronger when the aperture is very large. Objects or portraits can be stronger with a low aperture 


How To Make a Geometric Collage using 
Adobe Illustrator & Adobe Photoshop


Watch this Awesome Video: Click Here

Contact Sheet: Take at least 30 new images using your aperture setting on the camera for this project. The subject is up to you. You can show various ideas in your contact sheets

Objective: To create a geometric photo using a combination of Illustrator and Photoshop with a focus on selections. 

Timeline: CS due for this term report card
Work Time: This will take 2/3 classes depending upon your skill level to create and publish
Due: Should be up and posted to your blog with a reflection on the process and your choices by February 3rd.  

Steps:
  1. Use the sample images below to help you start thinking creatively. 
  2. Brainstorm and think about what pattern and subject you would like to create.
  3. Take at least 30 images and print a contact sheet
  4. Edit the strongest or images that you would like to combine
  5. Work in Illustrator to create a geometric pattern using only line
  6. Transfer the pattern into Photoshop and invert to white (if you want no outline this is more advanced and I can work with you one on one)
  7. Use the magic wand to select areas and copy and paste from your edited photographs
  8. If you would like the vintage look that is displayed in the video, use color adjustments over the final layers as well as a texture overlay for a gritty texture from Spoon Graphics Freebies :)


Thursday, December 22, 2016

Light and Shadow

EU: Learning to see light and use it in your photographs is an important skill that will make your photographs stronger 

EQ: How can you use light and shadow to create a stronger image?

New Camera Function: I want you to work in Aperture mode for this assignment. When shooting an object this will help to get either a clear or softly blurred background. 

A Simple Exercise to help you learn to See Light


Watch this Video: Click Here

Homework for the week: Take 5 photographs of an egg to edit and post on your blog this week. (For our purposes, you may move the egg around or shoot at different times of day)

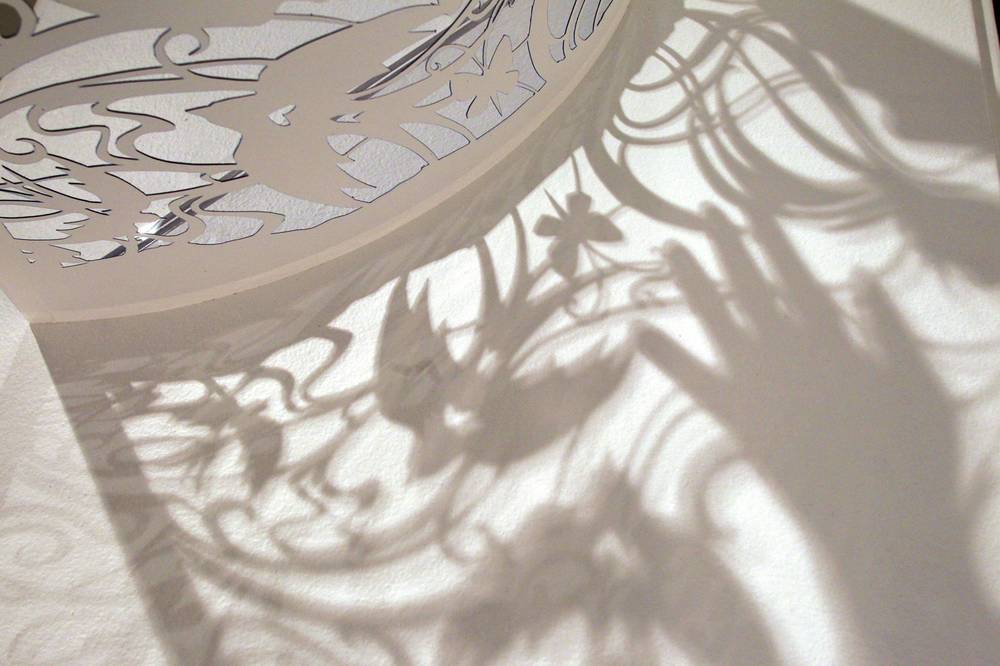
In class assignment: Cut Paper with Light and Shadow

Objective: to create a subject using cut paper to capture light and shadow in photography

Timeline: 5 classes (3 to brainstorm and build, 1 to shoot, 1 to edit and blog)

Steps:
  • Use the sample images below to help you start thinking creatively. We can use the light tents to shoot for this project which will simulate better lighting conditions using diffused light for your subject matter. (Hint: the designs below are somewhat elaborate because I would like you to push yours to be elaborate as well)
  • Brainstorm and think about how you would like to use cut paper to shoot your images
  • You will have to draw for this assignment, this may be challenging for many of you so it may be good to develop a pattern versus an image. 
  • Start cutting using only white paper, Exacto knives and scissors being careful not to rip or tear your paper (tip: if you get it dirty in areas you can Photoshop it out but try your best to keep it clean)
  • If you have a very creative idea beyond the white paper and cutting you may ask me if it is okay to pursue it (creativity is good but I want your main goal to really be focusing on the light and shadow in the final images)
  • Shoot your finished piece using light to your advantage (use phones as flashlights, diffused spotlights, windows, etc for light sources)
  • Print a contact sheet of 30 images. 
  • Edit and post your 1 or 2 of your strongest images with a reflection


Thursday, December 15, 2016

Double Exposure: Silhouette Tutorials

12/15 

Please watch the tutorials below and begin your project or practice with internet images (if you do not yet have your images). They are due next week so you should have them at this point.

Although there are many different styles of double exposure these will help you get the sense of what I have been going over in class. Some of the wording in the videos are different but you know all of the tools. Selections can be made in many ways but you guys should try to use the "Select and Mask" tool that you are used to. You can watch and bring up Photoshop and press pause while practicing each step. 

*There are also many more tutorials on Youtube to view so take advantage!!!

Double Exposure Effect Photoshop Tutorial


Easy Double Exposure #Photoshop Tutorial

(This one is harder, but it has the empty top of the head which you may want, also the narrator uses adjustment layers on his layers palette but you can use them by going to image->adjustments like you are used to) I am talking about Black and White, etc.....)